
Intro
Organization is vital in my life. It is necessary to get things done and get them done effectively. However, coming into high school, I feared the new effort required to stay on top of my work. Designing a phone holder as my second introductory project was the perfect answer to staying organized and introducing myself to a crucial part of engineering–CAD.
This phone holder was designed to hold and charge any phone and an Apple Watch. To complete this project, my timeline consisted of first researching phone holders already on the market. Once this was done, I sketched out a new design that incorporated some features of phone holders I researched. After I established a design, I developed two prototypes. Finally, I then created the phone holder in CAD and printed it out using a 3D printer. To develop this, I made two iterations of the design. After prototyping was complete, I used the online CAD software, TinkerCad to design and 3D print the phone holder.
This phone holder was designed to hold and charge any phone and an Apple Watch. To complete this project, my timeline consisted of first researching phone holders already on the market. Once this was done, I sketched out a new design that incorporated some features of phone holders I researched. After I established a design, I developed two prototypes. Finally, I then created the phone holder in CAD and printed it out using a 3D printer. To develop this, I made two iterations of the design. After prototyping was complete, I used the online CAD software, TinkerCad to design and 3D print the phone holder.
Iterative Design Process
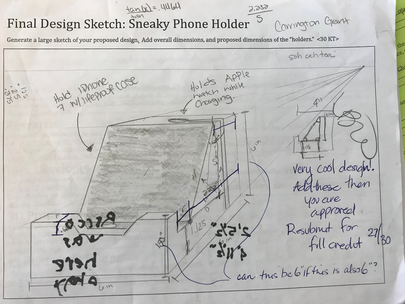
SPS Sketch
The first step in this project consisted of researching phone holders already on the market. Through this research, I was able to incorporate developed ideas but also integrate new ones. These ideas were expressed through a single point-perspective sketch.
The first step in this project consisted of researching phone holders already on the market. Through this research, I was able to incorporate developed ideas but also integrate new ones. These ideas were expressed through a single point-perspective sketch.
|
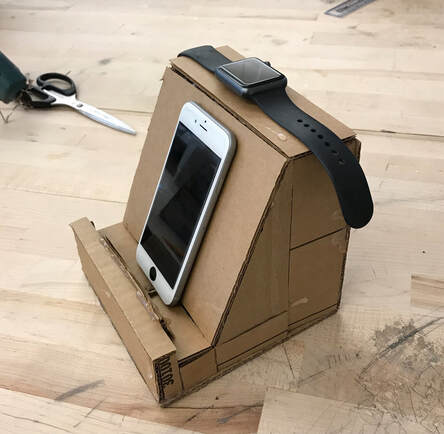
Prototype 1
After I created a preliminary design and sketch, I created 3D prototypes out of cardboard material. With this prototype, I was able to evaluate and test the effectiveness of my design successfully. From this critical part of the design process, I determined three actions necessary:
|
|
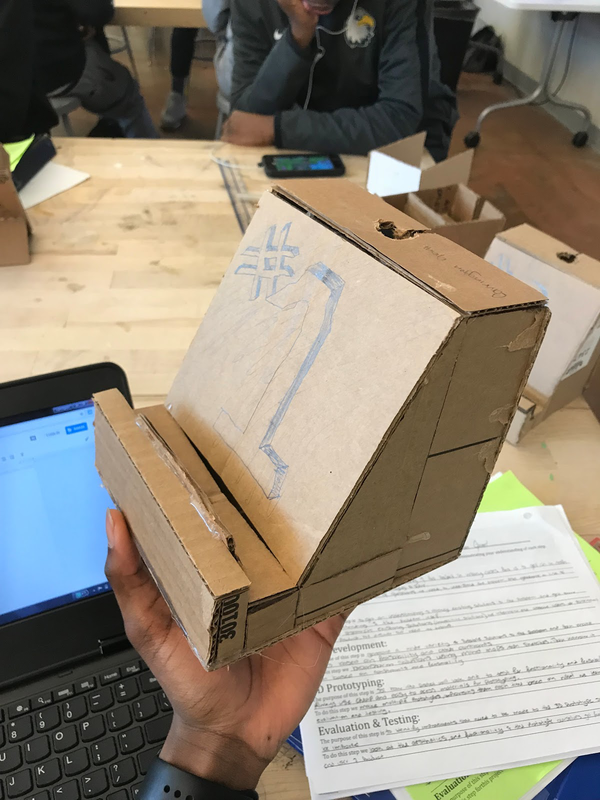
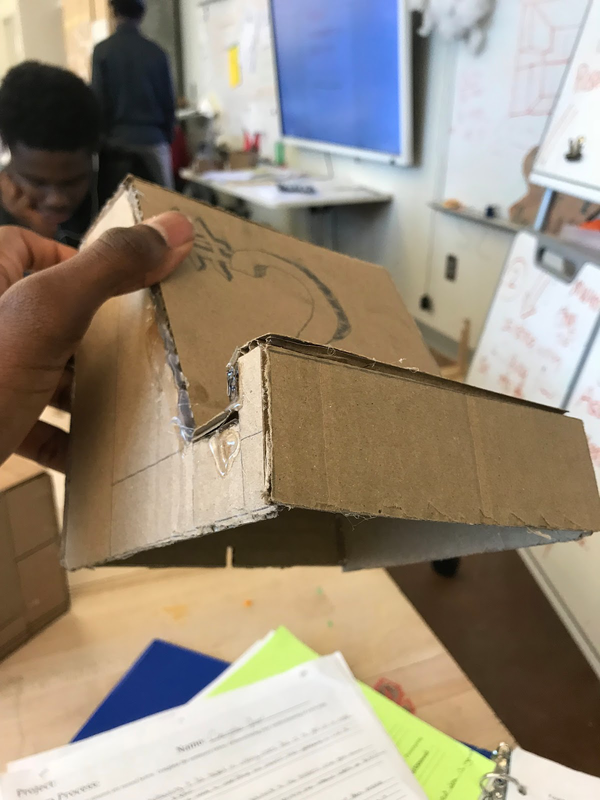
Prototype 2
After evaluation and testing of the first prototype, I executed all changes that I saw necessary. As seen in the picture, the holder's bottom is removed, the phone holder's height was reduced by 1 inch, the width was reduced by 1.5 inches, and the prototype's craftsmanship is increased substantially by using one parted sides.
After evaluation and testing of the first prototype, I executed all changes that I saw necessary. As seen in the picture, the holder's bottom is removed, the phone holder's height was reduced by 1 inch, the width was reduced by 1.5 inches, and the prototype's craftsmanship is increased substantially by using one parted sides.
CAD Production
In the final step of the project, I worked to create a CAD file of my design. I did this on the internet software TinkerCad. With this file, I could export my design to a 3D printer, producing a final 3D product.


